
The most effective handwriting practice pairs short, frequent letter-formation drills with multisensory tactile activities and fine-motor warm-ups. Sand trays, rice bins, and shaving cream build letter memory without the pressure of a pencil; short finger and wrist drills wake up the hand; then targeted letter drills lock in the motion. Start today with a short sand tray or a printed tracing line session each day, and build from there.
TL;DR:
- Multisensory tactile activities like sand, rice, and shaving cream help build letter memory and reduce performance pressure, especially for hesitant writers.
- Warm-up exercises such as tweezer pickups and playdough pinches improve hand strength and fine-motor control, making handwriting more sustainable.
- Starting with uppercase letters before lowercase and fitting handwriting into real writing tasks enhances skill development without rushing the process.
- Proper posture and grip, checked in five-minute setups, support better formation and reduce fatigue for children at all skill levels.
- Short, daily practice sessions focused on real tasks and tactile activities are more effective than long, infrequent drills for building handwriting fluency.
Table of Contents
- Handwriting Practice Activities by Category: Where to Start
- Multisensory Handwriting Practice at Home: Sand, Rice, Shaving Cream, and Clay
- Fine-Motor Warm-Ups That Prep the Hand for Writing
- The Letter-Formation Sequence: Uppercase First, Then Lowercase, Then Words
- Fixing Posture and Pencil Grip in Five Minutes
- Weekly Practice Plans That Actually Get Used
- Free Printables and Low-Cost Materials Worth Having on Hand
- Why Trust This Guidance
- Tracking Progress Without Turning It Into a Test
- Connecting Handwriting Practice to Reading and Spelling
- Common Handwriting Problems and What Actually Fixes Them
- Staying Patient With a Reluctant Writer
- Bring the Practice Home With a Ready-Made Activity Book
- Sources
Handwriting Practice Activities by Category: Where to Start
Not every child needs the same starting point. A four-year-old who can't yet hold a marker steady needs something very different from an eight-year-old whose letters are legible but painfully slow. Sorting activities into five categories makes it easier to match the exercise to the kid in front of you, rather than grabbing whatever worksheet is closest.
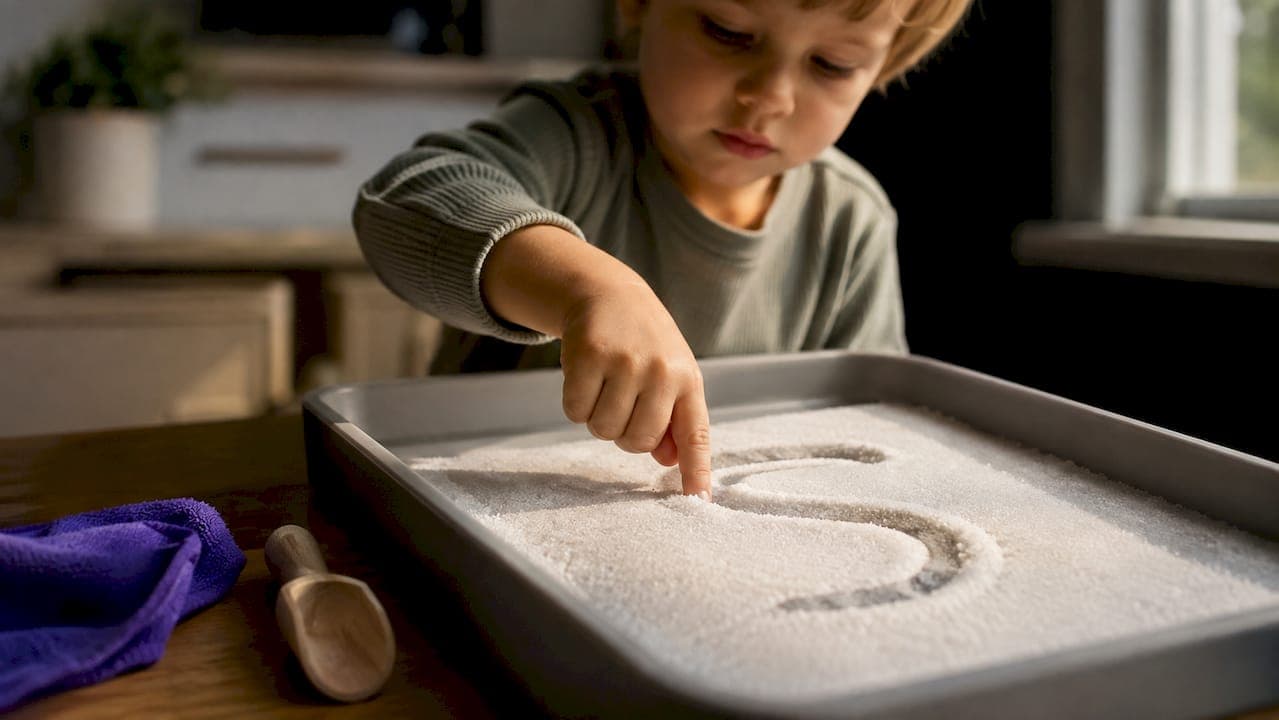
Multisensory activities train tactile memory and visual-motor coordination by letting a child feel a letter shape instead of just drawing it. A finger dragged through rice or shaving cream registers differently in the brain than a pencil line, and that repetition builds shape memory while lowering performance pressure because mistakes vanish with a swipe of the hand.
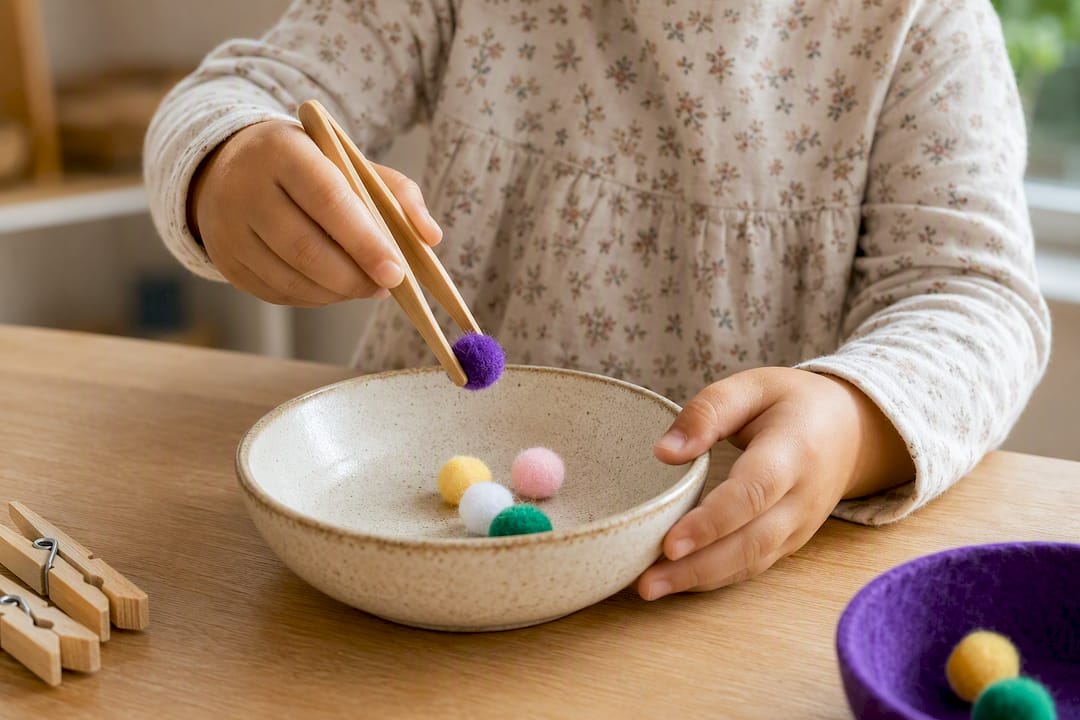
Fine-motor activities build the small-muscle strength and pinch grip a pencil actually requires. Think tweezers picking up pom-poms, clothespins clipping cards, or playdough rolled into snakes and pinched into balls.
Gross-motor activities sound unrelated to handwriting until you watch a child with weak shoulder stability try to write. Big arm movements on a vertical surface, chalk on a fence, finger-painting on an easel, all build the shoulder and arm control that has to exist before fine pencil control is possible.
Letter drills are the traditional core: tracing, copying, and eventually independent writing of specific letters, in a set order.
Games wrap all of the above in something that doesn't feel like a worksheet: scavenger hunts for letters, "spy the mistake" comparisons, timed copy races against a sibling.
Here's how those categories break down by what they train and what they take to set up:
- Multisensory: trains tactile letter memory and hand-eye coordination. Try a salt tray, a bag of hair gel sealed flat for finger tracing, or warm shaving cream on a tray.
- Fine-motor: trains hand strength and pinch control. Try tweezer-and-pom-pom sorting, playdough letter rolling, or clothespin alphabet matching.
- Gross-motor: trains shoulder and arm stability. Try wall chalk letters, sidewalk chalk hopscotch tracing, or giant arm circles tracing letters in the air.
- Letter drills: trains motor memory for specific letter shapes. Try dot-to-dot tracing, guided copy lines, then independent copy without a model.
- Games: trains motivation and repetition without burnout. Try a letter scavenger hunt around the house, "guess the letter" back-writing with a finger, or a timed "how many words can you write" challenge.
Readiness is easy to spot if you know what to look for. A child who can't yet stack blocks or use scissors with any control isn't ready for fine pencil drills, no matter their age; they need more gross-motor and fine-motor warm-up time first. A child who traces confidently but freezes on a blank page needs more guided copy before independent writing. Watch the frustration level, not the calendar age.
Pro Tip: Rotate categories within a single week instead of drilling the same type every day. A child who does tactile tracing on Monday, tweezer games on Tuesday, and letter copy on Wednesday builds skill faster than one who does the same worksheet five days straight, because the brain consolidates motor patterns during the variety, not the repetition of one task.
Multisensory Handwriting Practice at Home: Sand, Rice, Shaving Cream, and Clay
Tactile media work because they remove the one thing that makes handwriting stressful for a shaky writer: permanence. Ink on paper feels final. A finger stroke through rice disappears the moment you smooth it over, and that low-stakes feedback loop reduces performance anxiety and keeps kids practicing longer than a page of pencil lines ever will.
Sand or salt tray. Pour a thin layer of play sand or table salt into a baking tray. Have the child trace letters with an index finger while saying the letter name out loud. Shake the tray flat between letters. Cleanup takes thirty seconds with a lid.
Rice bin. Fill a shallow bin with dry rice a half-inch deep. Same tracing motion, but the texture is grainier and gives more resistance, which helps kids who need extra sensory input to register the movement.
Shaving cream on a tray. Spray a layer directly onto a cookie sheet or laminate placemat. This one is messier but kids love it, and the slight resistance builds hand strength while they write.
Air-dry clay or playdough letters. Roll ropes of clay and shape them into letters, or press a finger into a flattened slab to carve the shape. This is the slowest of the four but the best for kids who need to build a letter, not just trace it, before they truly understand its form.
- Line a tray with a towel underneath before starting to catch spills.
- Keep a damp cloth nearby for quick hand wipes between activities.
- Start with the child's name letters before moving to the full alphabet, so early wins come fast.
- For sensory-sensitive kids, swap sand or rice for a sealed gel bag: same tracing motion, zero mess, and a barrier between skin and texture.
Left-handed writers benefit from these same setups with one adjustment: position the tray or bag so the child's writing hand doesn't drag across a wet or loose surface. Angling the tray slightly to the left, rather than dead center, keeps the wrist in a more natural position and avoids the smearing that frustrates lefties on shaving cream especially.
Pro Tip: If a child resists pencil practice but tolerates almost anything with their hands, that's a signal to spend more time here, not less. Tactile practice isn't a warm-up you rush through. For a resistant writer, it might be 80 percent of the week's practice for a while.
Fine-Motor Warm-Ups That Prep the Hand for Writing
A child who sits down cold and starts copying letters is working with an unwarmed hand, and it shows in shaky lines and quick fatigue. A five to ten minute warm-up routine before letter practice makes a measurable difference in how long a child can write before their hand gets tired.
- Tweezer pickup (2 minutes): Use kitchen tweezers or tongs to move ten pom-poms or dried beans from one bowl to another. This isolates the same pincer grip used to hold a pencil.
- Playdough pinch and roll (3 minutes): Roll five snakes, then pinch each one flat with thumb and forefinger. Builds the exact muscles that control pencil pressure.
- Finger walks (1 minute): Walk fingers up and down a tabletop like a spider, one at a time, both hands. Wakes up isolated finger control. 8888888888888
- Clothespin clips (2 minutes): Clip six clothespins onto the edge of a box or paper plate, then remove them. Directly targets thumb-finger opposition strength.
- Wrist circles and shakes (1 minute): Ten slow circles each direction, then a loose shake out. Reduces tension before fine work begins.
Run these immediately before letter drills, not hours earlier, since the benefit fades once the hand cools down again. Five reps or repetitions per exercise is plenty for most five to eight year olds; there's no benefit to pushing past ten. Watch for two simple progress cues: does the child's grip look less white-knuckled after two weeks of warm-ups, and can they complete a full tracing line without shaking out their hand halfway through? Regular craft and coloring activities build the same control over time, so weekend coloring sessions count as practice too, not just a distraction from it.
The Letter-Formation Sequence: Uppercase First, Then Lowercase, Then Words
Handwriting instruction follows a set order for a reason: uppercase letters are simpler shapes, mostly straight lines and single curves, so they come first in the standard learning progression, typically starting around age four or five. Lowercase letters follow once uppercase control is solid, because lowercase introduces trickier features like ascenders, descenders, and the tight curves in letters such as "a" and "e." Words and short sentences come next, usually by age six or seven. Cursive or joined-up writing is typically introduced between ages seven and nine, once print letters are consistent and legible on their own.
Each stage benefits from the same three-step drill format:
- Tracing: the child follows a dotted or shaded letter with arrows showing stroke direction. This is where a book of guided pages, like Munkterproducts' Big Book of Letters, earns its keep, since the sequence is already built in.
- Guided copy: the model letter sits directly above or beside a blank line, and the child copies without tracing over it.
- Independent copy: the model is removed entirely, and the child writes the letter, then the word, from memory.
Move to the next stage only when a child can complete independent copy legibly, not just quickly. Rushing a shaky uppercase writer into cursive rarely ends well; it just adds a new layer of confusion on top of a shape they haven't fully learned yet.
Fixing Posture and Pencil Grip in Five Minutes
Bad handwriting is sometimes a formation problem and sometimes a setup problem, and it's worth ruling out the second before assuming the first. Check these before blaming the letters themselves:
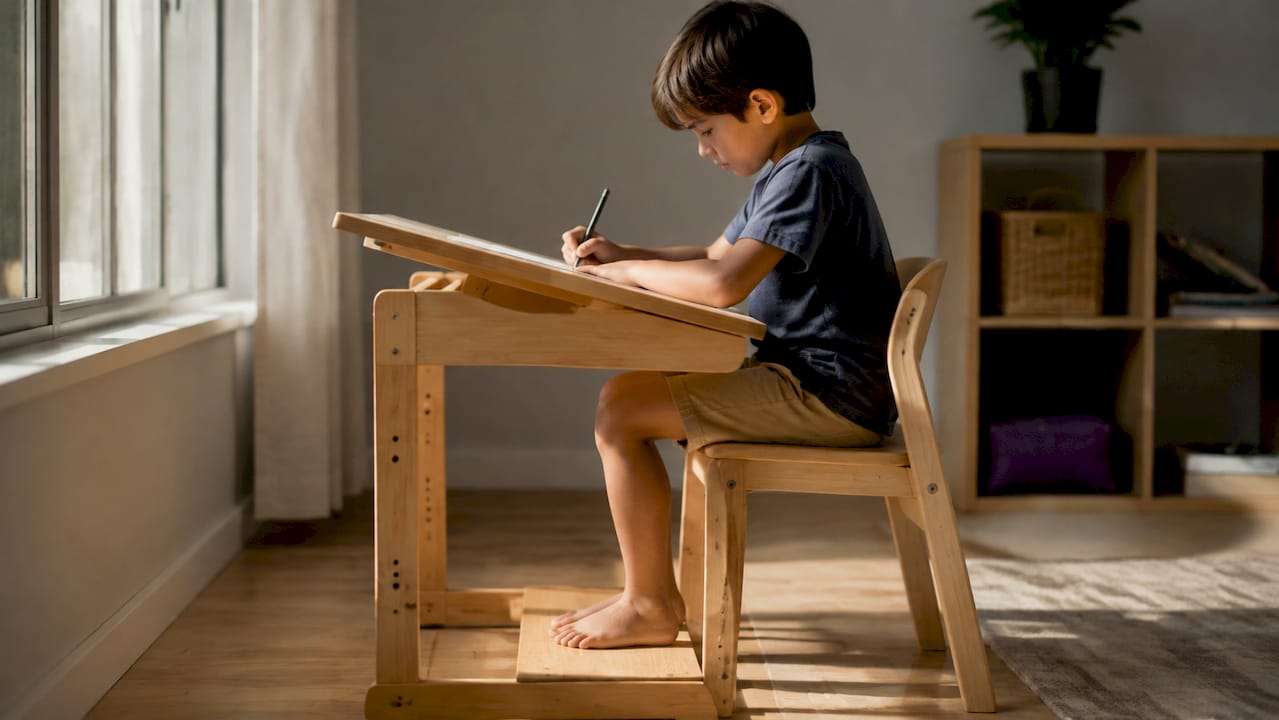
Feet should sit flat on the floor or a footrest, knees at roughly ninety degrees. If the chair is too tall, the legs dangle and the core has nothing to stabilize against, which shows up as sloppy, uneven letters. The table height should let elbows rest near a ninety-degree bend, not hiked up near the shoulders. Paper should sit at a slight angle, tilted toward the writing hand, roughly twenty to thirty degrees for right-handed writers and the mirror angle for lefties.
For grip, a simple pinch-and-lift test works well: have the child pick up a small object, like a coin, using just thumb and index finger. If they can do that smoothly, they likely have the strength for a tripod grip, and a rubber pencil grip aid can help train the position without forcing it. Keep the same grip aid and paper angle at home that the classroom uses; switching between two different setups slows progress more than sticking with either one consistently.
Left-handed writers need the paper angled the opposite direction and enough elbow room on their left side so they're not bumping a right-handed sibling or classmate. Encourage a grip that keeps the wrist straight rather than hooked over the top of the line, since a hooked wrist is what causes the smearing lefties often complain about.
Weekly Practice Plans That Actually Get Used
Short and frequent beats long and rare, every time. Guidance from occupational therapy points to five to ten minutes for children ages five to seven, and ten to fifteen minutes for older children, done most days of the week rather than one thirty-minute session on Sundays. The muscle memory that makes letters automatic builds through repetition, not duration, and a tired hand ten minutes in starts undoing the benefit anyway.
- Starter week (new to practice): short daily sessions, split between a brief warm-up and tactile tracing on a single letter group. No pencil yet if the child resists it.
- Two-week progress plan: short daily sessions including warm-ups, tactile or gross-motor practice, and letter drills progressing from tracing to guided copy.
- Maintenance plan (skills established): short practice sessions several days a week, focused on real writing tasks rather than drills: a grocery list, a note to a grandparent, three sentences about the school day.
The maintenance stage is where real-world writing does more good than another worksheet. Tying practice to something the child actually cares about, a birthday card, a wish list, a caption under a drawing, keeps motivation from collapsing once the novelty of tracing wears off.
Pro Tip: Keep a small notebook by the door and have the child write one sentence about something that happened that day, every single day, for two weeks straight. It takes ninety seconds and does more for handwriting fluency than most standalone worksheets, because the child is writing content they generated themselves, not copying someone else's words.
Free Printables and Low-Cost Materials Worth Having on Hand
Printable worksheets earn their spot in a practice routine when they follow the same model-trace-copy format used everywhere else: a shaded or dotted model letter, a traced line beneath it, then a blank line for independent copy. Free worksheet generators let you customize the font style, print versus cursive, line spacing, and even plug in a child's own name or spelling words, which beats a generic downloaded sheet every time because the content is personally relevant.
When picking a generator, look for options to adjust letter size (bigger for beginners, smaller as control improves) and stroke-order arrows, since those arrows are what actually teach correct formation instead of just legible copying.
A basic supply list covers most of what's outlined above without much expense:
- A shallow tray or baking sheet for sand, rice, or shaving cream
- Play sand, table salt, or dry rice (a few dollars for a bag that lasts months)
- Playdough or air-dry clay
- Kitchen tweezers or tongs and a bag of pom-poms
- Sidewalk chalk for gross-motor letter tracing outdoors
- A basic three-line ruled notebook for daily sentence writing
For families who want the letter sequence and prompts already laid out rather than assembling worksheets themselves, a structured workbook covers the same ground with less setup.
Why Trust This Guidance
The activities and sequence described here follow the same progression occupational therapists and early-years educators use in classrooms: gross-motor and tactile foundations first, fine-motor strength second, letter formation third, real writing tasks last. Munkterproducts built its Big Book of Letters and Large Pre School Work Book around that exact order, uppercase before lowercase, tracing before independent copy, so a parent or teacher working through either book is following the sequence rather than guessing at it.
Munkterproducts' blog covers related ground worth a look, including how craft and coloring activities build the fine-motor control handwriting depends on, and how to match phonics activities to a child's stage so letter practice and early reading reinforce each other instead of competing for attention.
Tracking Progress Without Turning It Into a Test
Speed is the wrong thing to measure early on. Legibility and consistency matter more, and they're easier to track without making a child feel graded. Keep a simple folder, physical or a phone photo log, of one writing sample every two weeks: the same sentence or the child's name, written the same way each time. Side by side, drift and improvement both show up fast, and a parent doesn't need a rubric to see a shaky uppercase "M" tighten up over a month.
Three things worth watching: does the letter sit on the line instead of floating above or below it, does the child's grip look relaxed by the end of a session rather than clenched, and can they finish the same task in less time without new mistakes creeping in. That third one, error rate holding steady or dropping as speed improves, is a better fitness check than speed alone, since a child who writes fast and sloppy hasn't actually gained a skill.
Skip formal handwriting tests for kids under seven. A two-week photo comparison tells you more than a scored worksheet, and it keeps the pressure off a child who's still building basic control. If a photo log shows no change after six to eight weeks of consistent practice, that's the signal to adjust the approach, not to push harder on the same drills that aren't working.
Connecting Handwriting Practice to Reading and Spelling
Handwriting and literacy aren't separate skills competing for the same twenty minutes after dinner; they reinforce each other when practice is set up right. Writing a letter while saying its sound out loud builds the same phonics connection a reading lesson does, just through a different sense. A child tracing "b" while saying "buh" is linking shape, sound, and motion all at once, which sticks better than any of those three alone.
Spelling practice doubles as handwriting practice almost automatically. Instead of a flashcard drill, have the child write each spelling word three times: once traced, once copied, once from memory, saying the letters out loud each time. That's handwriting repetition and spelling reinforcement in a single five-minute task rather than two separate ones competing for attention on a busy evening.
Reading aloud together and having the child copy a favorite line from the book afterward works the same way. It gives handwriting practice actual content instead of arbitrary letters, and it shows a child that writing is a tool for capturing stories they already love, not a chore disconnected from anything interesting.
Common Handwriting Problems and What Actually Fixes Them
Letters that float above or dive below the line usually trace back to a paper or visual tracking issue, not a motor one. Raised-line paper, or simply running a finger along the baseline before writing each word, often fixes this faster than more drilling would.
Reversed letters, like a backward "b" or "d", are common and mostly age-typical up through age seven, so it's rarely worth panicking over. If it persists past that, pair the letter with a physical cue: "b has a belly that starts with a stick," said while tracing, gives the hand and the mind the same anchor point.
Inconsistent letter sizing within a single word often comes down to weak finger isolation rather than carelessness. More tweezer and pinch warm-ups before writing tend to help more than a stern reminder to "write neater."
A death grip on the pencil that leaves white knuckles and a tired hand after two sentences points to grip strength, not motivation. Shorter sessions with more frequent hand breaks, plus the fine-motor warm-ups above, usually loosen the grip over a few weeks.
Total resistance to picking up a pencil at all is the one worth treating as a signal rather than a behavior problem. That's when tactile, no-pencil activities should take over the bulk of practice time until the resistance eases.
Staying Patient With a Reluctant Writer
Kids who dig their heels in about handwriting are almost never being difficult on purpose. Usually the pencil itself has become the problem, tied to memories of frustration or a worksheet that felt impossible. The fix that works more often than any drill is switching the medium entirely for a while: shaving cream instead of paper, chalk on the driveway instead of a workbook page, a grocery list instead of a spelling sheet.
Cutting session length in half also does more good than pushing through a fight. Five focused minutes that end on a win beat fifteen minutes that end in tears, every single time, and the child remembers the ending far more than the middle.
The other move that consistently works: attach the writing to something the child already cares about. A kid who won't trace letters will often happily write a birthday list for a favorite toy, or a caption under their own drawing. The letters are the same; the motivation is not.
For tomorrow, try this: pick one tactile activity, run it for five minutes, and end before the child asks to stop. That's the whole plan.
— Mark
Bring the Practice Home With a Ready-Made Activity Book
Setting up sand trays and warm-ups works, but some days you need something a child can open and start on without any prep. Munkterproducts' activity books fill that gap. The Big Book of Letters walks through uppercase formation first, then lowercase, with tracing templates that match the model-trace-copy sequence described above, so it slots directly into a starter-week or maintenance routine without extra planning. The Large Pre School Work Book works well alongside tactile and warm-up activities, giving a young writer structured pages to move to once tracing in sand or rice starts feeling too easy. Both books are built to sit beside the tactile and fine-motor activities in this guide, not replace them, giving a child something concrete to hold on the days when a sand tray isn't practical. For a themed option that turns letter and pattern practice into something more playful, the Egg-cellent Easter Activity Book mixes tracing and maze-style prompts into one large format book. Order either one directly from Munkterproducts and have it in hand within days.
Sources
Readers looking for deeper detail on any single piece of this guide can go straight to the sources behind it. Oxford Owl's handwriting guidance covers how craft and coloring build the control kids need before formal writing. The Gateshead Health multi-sensory pre-writing resource lays out tactile and gross-motor setups in more clinical detail. MPFT NHS's occupational therapy page covers session timing for older children. Printable Scholar offers free, customizable tracing worksheets worth bookmarking.
- Gateshead Health — Multi-sensory pre-writing
- MPFT NHS — High school support: handwriting
- Printable Scholar — Free printable handwriting worksheets