TL;DR:
- Creating handmade books allows personalized selection of materials and structure, elevating their aesthetic and tactile appeal.
- Mastering essential tools, various binding techniques, and cover customization enables you to craft durable, beautiful books suited to your style.
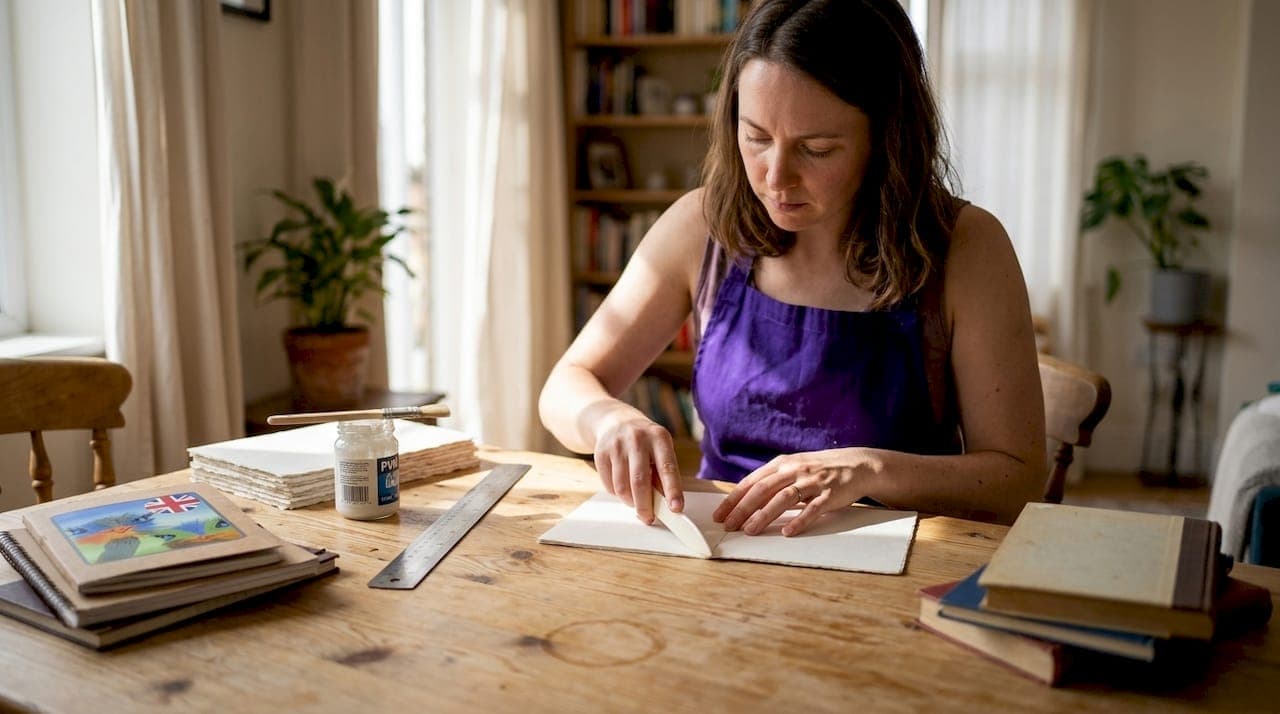
You bought another plain notebook, and the moment you opened it, that familiar disappointment hit. The paper is too thin, the cover is forgettable, and nothing about it feels like you. Creative bookbinding solves that problem completely. When you make your own books, you choose every detail: the paper weight, the cover material, the stitch pattern, the size. This guide walks you through the essential tools, the three main binding structures, custom cover techniques, and finishing tips that separate a rough first attempt from something you'd actually want to gift or display.
Table of Contents
- Tools and supplies for creative bookbinding
- Step-by-step: Folded, glued, and sewn structures
- Custom covers: Fabric, book cloth, and leather tips
- Precision and finishing: Cutting, trimming, and assembly
- What most DIY bookbinding guides miss: The artistry is in the details
- Get started with your creative bookbinding journey
- Frequently asked questions
Key Takeaways
| Point | Details |
|---|---|
| Gather quality tools | Having the right toolkit and materials makes bookbinding easier and leads to better results. |
| Choose your binding style | Select folded, glued, or sewn methods based on your project needs and skills. |
| Custom covers add flair | Fabric or leather covers give your books a unique, personalized finish. |
| Precision matters | Sharp cutting tools and mindful trimming are key to a professional-looking book. |
| Enjoy the process | Allow room for creativity, learning, and imperfection as you develop your bookbinding skills. |
Tools and supplies for creative bookbinding
Before you can stitch a single signature (a folded group of pages sewn together as one unit), you need the right toolkit. The good news is that a solid beginner setup costs far less than most people expect, and you can build up to specialty tools gradually.
The core toolkit every bookbinder needs:
- Bone folder: A flat, smooth tool made from bone or plastic used to score and crease paper cleanly without tearing fibers
- Awl or bookbinding needle: For piercing holes through signatures before sewing
- Bookbinding needles: Blunt-tipped needles that push through pre-pierced holes without splitting thread
- Linen thread or waxed thread: Strong, slightly flexible thread that holds signatures together over time
- PVA glue (polyvinyl acetate): The gold-standard adhesive for bookbinding because it dries flexible and clear
- Cutting mat and metal ruler: Essential for straight, safe cuts every single time
- Binder clips and book press (or heavy books): To hold glued sections flat while they dry
For more advanced projects, specialty tools like a book plough (a device that trims page edges evenly using a blade guided along a wooden rail) give you that crisp, professional edge. A spokeshave or leather paring knife becomes important once you move into leather-covered books.
| Tool | Beginner need | Cost range | Where to find |
|---|---|---|---|
| Bone folder | Essential | $5 to $15 | Art supply stores, online |
| Awl | Essential | $4 to $10 | Hardware or craft stores |
| PVA glue | Essential | $6 to $12 | Art supply stores |
| Book plough | Advanced | $40 to $120 | Specialty bookbinding suppliers |
| Leather paring knife | Advanced | $20 to $60 | Bookbinding or leather craft shops |
When it comes to paper, the weight matters more than most beginners realize. Text-weight paper (around 60 to 90 gsm) is ideal for interior pages because it folds cleanly and doesn't add excessive bulk to your signatures. Cover boards, often called book board or binder's board, are dense and rigid, giving hardcover books their structure. Fabric, decorative paper, and leather all work beautifully as cover materials.
Dartmouth College's Book Arts research guide organizes bookmaking and bookbinding into categories like folded books, glued books, and sewn structures, and points to references plus templates that help beginners understand the range of possibilities from the start.
Understanding the handcrafted book benefits goes beyond aesthetics. Handmade books carry a tactile quality that mass-produced stationery simply cannot replicate, and that quality starts with thoughtful material choices.
Pro Tip: Use thin fabric for your covers rather than thick canvas or upholstery material. Thin cotton or muslin is far easier to fold neatly around corners without creating lumpy, uneven edges.
Budget sourcing tip: Check thrift stores for old hardcover books you can pull apart for their boards. Estate sales often yield linen thread, bone folders, and even old bookbinding tools at a fraction of retail prices.
Step-by-step: Folded, glued, and sewn structures
Once your tools and materials are ready, it's time to explore the main DIY bookbinding methods. Each structure has its own strengths, and choosing the right one depends on how you plan to use the finished book.

Folded books are the most accessible starting point. You fold sheets of paper in half, nest them together, and either staple or sew through the spine. The result is a simple pamphlet or zine-style booklet. No glue required, minimal tools needed, and the learning curve is gentle enough for beginners of any age.
Glued books (perfect binding) are what you see on most paperback novels. Pages are gathered, their spines are roughed up slightly to improve adhesion, and then glue is applied to hold them together inside a wrapped cover. This method is fast and produces a clean, flat spine. The trade-off is that perfect-bound books don't lie completely flat when open.
Sewn structures are the most durable and the most satisfying to make. Signatures are sewn individually, then sewn together along the spine using a variety of stitch patterns including Coptic stitch (an exposed spine style that lets the book open flat), kettle stitch, and long stitch. Bookmaking structures like these are well-documented with templates available for each format.
Basic workflow for a sewn hardcover book
- Fold your interior pages into signatures of 4 to 6 sheets each (8 to 12 pages per signature)
- Pierce sewing holes through each signature using your awl and a piercing template
- Sew signatures together using a consistent stitch pattern, keeping tension even throughout
- Glue a strip of mull (an open-weave fabric) across the spine to reinforce the sewn signatures
- Trim the bookblock edges if needed using a book plough or sharp craft knife and metal ruler
- Prepare your cover boards and cut them slightly larger than the bookblock (about 3 mm overhang on three sides)
- Attach the bookblock to the cover using the mull and end papers, pressing firmly until dry
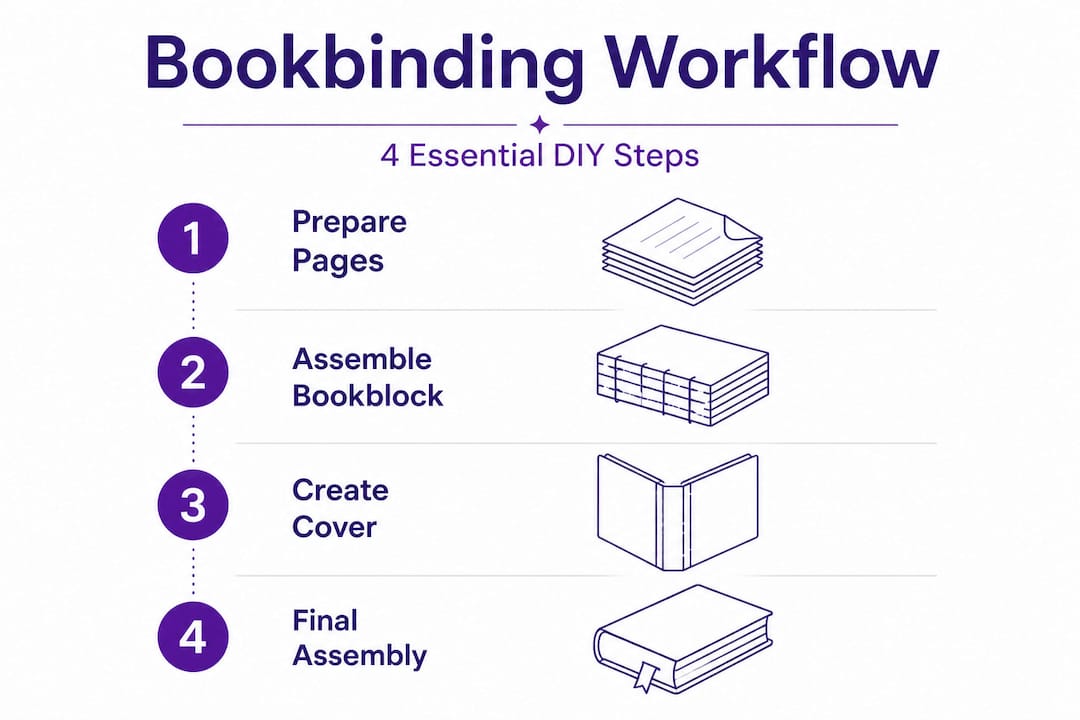
The DIY hardcover process involves preparing signatures, assembling the bookblock, and then creating and attaching the cover. Each stage builds on the last, so rushing any step creates problems that compound later.
| Structure | Skill level | Tools needed | Best for |
|---|---|---|---|
| Folded (pamphlet) | Beginner | Bone folder, needle | Zines, small journals |
| Glued (perfect bind) | Beginner to intermediate | PVA glue, clamps | Paperback-style books |
| Sewn (case-bound) | Intermediate to advanced | Full toolkit | Durable journals, art books |
Hands-on public workshops for folded book formats are available for ages 10 and up in many communities, which shows how approachable this entry-level structure really is. If you can attend one in person, even just once, the tactile experience accelerates your learning dramatically.
Looking at an activity book step-by-step can also inspire ideas for how to structure the interior pages of your handmade books, especially if you're making them for children or as educational gifts.
Pro Tip: Practice your folding technique with scrap paper before touching your final materials. Consistent, confident folds come from muscle memory, not from thinking carefully about each crease. Ten minutes of practice folds saves you from crooked signatures later.
Custom covers: Fabric, book cloth, and leather tips
With your bookblock ready, the next creative leap comes from making beautiful custom covers. The cover is the first thing anyone sees and touches, so this is where your personal style really shows.
Making book cloth is one of the most rewarding skills in the bookbinder's toolkit. Book cloth is fabric that has been backed with Japanese tissue paper and diluted PVA glue, creating a material that behaves like paper but looks and feels like fabric. You can use almost any woven fabric, but thin fabric is easier for turning corners, while linen and heavier weaves are trickier to work with cleanly.
The basic book cloth process:
- Cut your fabric slightly larger than the cover board you plan to cover
- Brush a thin, even layer of diluted PVA onto Japanese tissue paper
- Lay the fabric face-down onto the glued tissue and smooth out bubbles with a bone folder
- Allow to dry completely (usually 20 to 30 minutes) before using
- Trim to size and apply to your cover board using fresh PVA
The result is a material that won't fray, glues cleanly, and gives your book a polished, professional look. Printed cotton, linen blends, and even lightweight canvas all create beautiful effects.
Leather binding is the pinnacle of traditional bookbinding craft. The biggest challenge with leather is managing bulk, especially at the corners where material overlaps. Leather paring is the process of thinning the leather at its edges using a sharp paring knife or spokeshave, and it's critical to avoid bulky, stiff corners in traditional hardcover work.
"A sharp knife is the bookbinder's most important tool. Dull blades drag and tear leather rather than cutting cleanly, which creates uneven edges that no amount of pressing will fix. Invest in a quality paring knife and learn to strop it regularly."
Work slowly when paring leather. Thin the edges in multiple light passes rather than trying to remove material all at once. Test your leather thickness by folding a small scrap over itself. If it folds smoothly without cracking or resisting, it's thin enough to turn corners cleanly.
Exploring creative journaling ideas can spark cover design concepts too. A leather-bound journal with a hand-tooled pattern or a fabric cover featuring a botanical print transforms a functional object into something genuinely artistic.
Pro Tip: Always test new cover techniques on scrap materials before applying them to a project you've spent hours building. A five-minute test on a scrap board can save you from ruining a finished bookblock.
Precision and finishing: Cutting, trimming, and assembly
No matter the cover, your book's polish comes down to careful cutting and confident finishing. This is where many DIY bookbinders plateau because they underestimate how much the final 10 percent of effort affects the overall result.
Key finishing steps:
- Score all fold lines with a bone folder and metal ruler before cutting
- Use a sharp craft knife or rotary trimmer rather than scissors for straight edges
- Replace blades frequently. A blade that's made 20 cuts is already dulling
- Trim the bookblock before attaching the cover, not after
- Use a bone folder to burnish all glued edges firmly, pushing out air pockets
The
than almost any other DIY method, and expert video guides cover both sharpening the blade and troubleshooting common problems like uneven cuts or blade chatter."Finishing is not a separate stage from binding. Every decision you make during assembly, from how tightly you sew to how evenly you apply glue, determines what you have to fix at the end."
Common problems and quick fixes:
- Wavy covers: Usually caused by gluing only one side of the board. Always line both sides of book board with paper or fabric to balance the tension
- Uneven page edges: Trim the bookblock while it's clamped firmly in a press. Movement during trimming is the main cause of ragged edges
- Glue seepage: Use less glue and apply it more evenly. PVA should be spread in a thin, consistent layer, not applied in blobs
Sharp tools and a methodical approach account for the majority of quality differences between beginner and experienced bookbinders. Exploring book supply alternatives can also help you find materials that make clean finishing easier, especially when it comes to cover papers and adhesives.
What most DIY bookbinding guides miss: The artistry is in the details
Most guides focus on steps and tools, which is necessary but incomplete. What they rarely say is that the moments that feel like mistakes are often what make a handmade book genuinely beautiful.
A slightly uneven sewing line, a cover fabric with a small wrinkle pressed flat, a corner that's not perfectly square. These are not flaws to apologize for. They are evidence that a human being made this object with care and attention. That quality is exactly what handcrafted work offers that no factory can replicate.
The bookbinders we admire most are not the ones who produce perfect, machine-like results. They're the ones who make deliberate choices. They choose a paper because of how it smells when it's cut. They pick a thread color that echoes the fabric on the cover. They leave the spine exposed because the stitching itself is part of the design.
This level of attention doesn't come from following instructions more carefully. It comes from slowing down and asking yourself what you actually want the book to feel like in someone's hands. That question, more than any technique, is what separates a craft project from a piece of art.
The practical lesson here is to resist the urge to rush toward the finished object. Spend time with your materials before you start. Fold a sheet of paper and notice how it resists or yields. Run your fingers over a piece of fabric and think about whether it matches the mood of the book you're making. These small acts of attention build the intuition that makes your work distinctive over time.
Get started with your creative bookbinding journey
Ready to bring your bookbinding vision to life? Here's how to start with confidence.
Whether you're just picking up a bone folder for the first time or you're ready to tackle leather-covered case-bound journals, the right resources make all the difference. At Munkter Products, you'll find a curated collection of handcrafted books, journals, and stationery that can inspire your own creative projects and give you a clear sense of the quality you're working toward.

If you're looking for ideas on how to structure the interior of your handmade books, browsing activity book inspiration is a great way to spark layout and content ideas for your next project. From guided journals to art books, the possibilities grow quickly once you have the foundational skills in place.
Frequently asked questions
What is the easiest bookbinding method for beginners?
Folded books are typically the easiest and require minimal tools, making them perfect for first-timers. Dartmouth's Book Arts guide highlights folded books as an accessible DIY format that anyone can start with immediately.
What fabric works best for making book cloth covers?
Thin cotton fabrics are ideal since they make corner folding easier and reduce bulk on covers. As noted in the DIY book cloth tutorial, linen is trickier to work with and better suited to more experienced bookbinders.
How do I get cleaner, straighter page edges in my handmade book?
Use a book plough for precise edge trimming and ensure your blades are sharp to achieve crisp results. Book ploughs enable cleaner cuts than freehand trimming and are worth the investment once you're making books regularly.
How can I prevent bulky corners when binding with leather?
Pare the leather edges gradually with a sharp knife, thinning the areas to be turned in or tucked. Edge paring leather is a foundational skill in traditional bookbinding and requires patience and iterative thinning rather than a single heavy pass.