TL;DR:
- Step-by-step bookbinding involves hand assembling, sewing, and finishing books to create durable, unique items. Knowing which method suits each project, such as pamphlet, Coptic, or case binding, saves time and resources. Proper preparation of pages, correct tool use, and attention to grain direction are essential for long-lasting, functional handmade books.
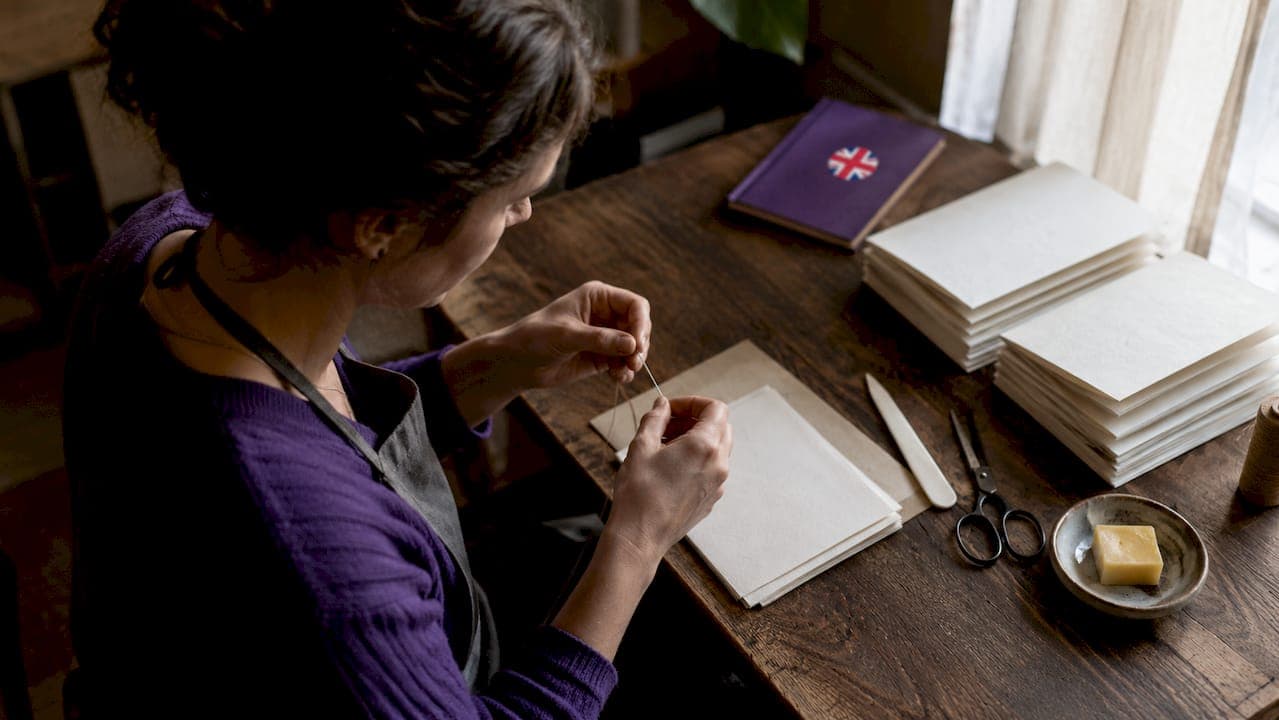
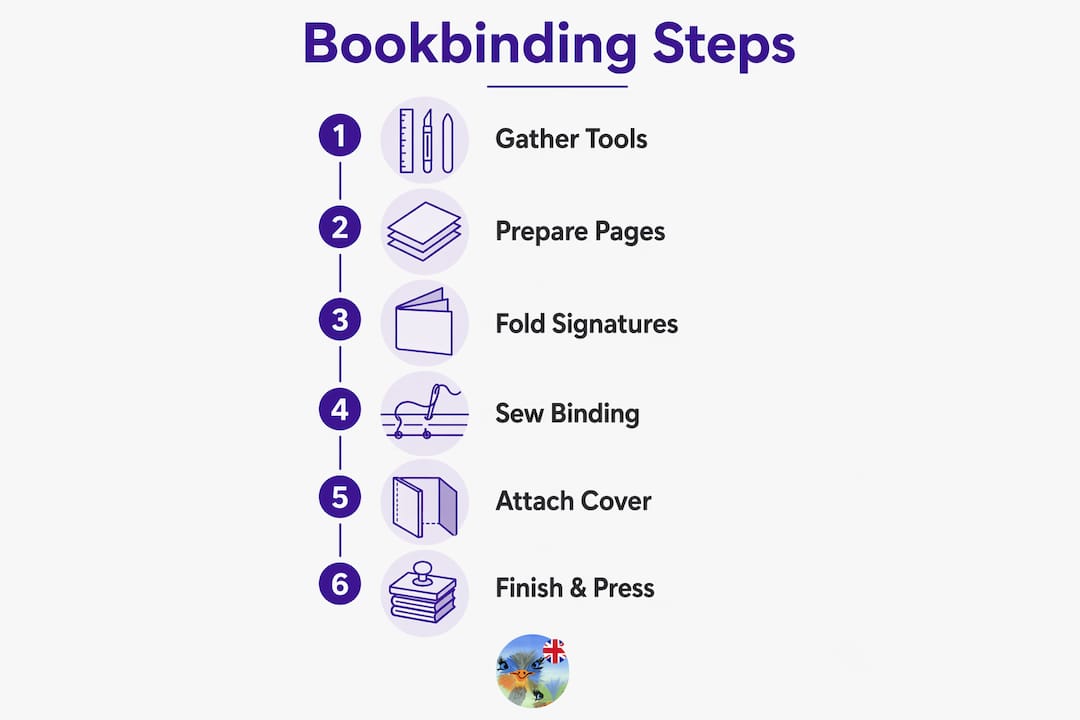
Step by step bookbinding is the process of assembling, sewing, and finishing books by hand to produce durable, unique notebooks, journals, or art books. This guide covers the full process from tools and materials to sewing signatures and attaching covers. You will learn three popular methods: pamphlet stitch, Coptic stitch, and case binding. Each method suits a different project, and knowing the differences saves you time, materials, and frustration. Expect to invest a few hours per book, and know that patience with folding and sewing pays off in a finished piece that lasts for years.
What tools and materials do you need for bookbinding?
The right tools make every stage of hand bookbinding faster and cleaner. A bone folder is the single most useful tool you can own. It scores and creases paper without tearing fibers, giving you sharp, flat folds that hold their shape. A bookbinding needle, an awl or hole punch, a metal ruler, and a sharp craft knife round out the core kit.
Materials vary by method, but a few items appear in nearly every project. Waxed linen thread is the standard choice because it resists fraying and holds tension well. PVA glue bonds paper and fabric without warping when applied in thin, even layers. Book board (also called binder's board) forms the rigid covers in case binding. Archival or text-weight paper works best for interior pages because it folds cleanly and holds ink without bleed-through.
Bookbinding techniques work across simple printables to complex manuscripts when the method is matched to the book's thickness and durability needs. That means your tool list should match your chosen method before you buy anything.
| Method | Key Tools | Key Materials |
|---|---|---|
| Pamphlet stitch | Needle, awl, bone folder | Waxed thread, text-weight paper |
| Coptic stitch | Needle, awl, ruler | Waxed linen thread, book board covers |
| Case binding | Bone folder, brush, craft knife | PVA glue, book board, fabric or decorative paper |
| Saddle stitch | Long-arm stapler, bone folder | Nested folded sheets |
- Bone folder: scores and creases without tearing
- Bookbinding needle: blunt tip prevents thread splitting
- Awl or hole punch: creates clean, consistent sewing stations
- Metal ruler: guides straight cuts and measurements
- Craft knife: trims covers and pages precisely
- PVA glue: bonds without warping when applied thinly
- Waxed linen thread: strong, smooth, and tangle-resistant
Pro Tip: Check paper grain direction before buying in bulk. Fold a corner gently in both directions. The fold that resists less runs with the grain. Always fold with the grain for clean, durable signatures.
How do you prepare and fold pages and signatures for binding?
Signature preparation is where most beginners make their first costly mistake. Folding paper against its grain is a common beginner error that prevents books from opening properly and reduces durability. The grain should always run parallel to the spine of the finished book.
Cut all pages to a uniform size before folding. If you are printing double-sided content, align your print margins carefully so text does not shift when the sheet is folded. A difference of even a few millimeters throws off the entire text block.
Group folded sheets into signatures of 4 to 6 sheets each. Fewer sheets per signature means cleaner folds and less stress on the thread. Use your bone folder to press each fold firmly from the center outward, which prevents air pockets and uneven creases.
- Cut all sheets to identical dimensions before folding
- Confirm grain direction runs parallel to the spine
- Fold each sheet individually, then nest them into groups
- Press every fold with a bone folder from center to edge
- Stack completed signatures under a heavy book for 10 minutes to set the creases
- Mark sewing station positions consistently across all signatures with a pencil and ruler
Pro Tip: Use a piece of scrap paper as a template for marking sewing stations. Punch holes through the template first, then use it to mark every signature identically. This eliminates spacing errors across the entire text block.
What are the step-by-step sewing and assembling techniques for common bindings?
Sewing is the structural heart of hand bookbinding. The method you choose determines how the finished book opens, how long it lasts, and how complex the process is. The table below contrasts the three most common methods.
| Method | Sewing complexity | Durability | Opens flat? |
|---|---|---|---|
| Pamphlet stitch | Low | Moderate | Yes |
| Coptic stitch | Medium | High | Yes |
| Case binding | Medium | Very high | Partially |
Pamphlet stitch: the beginner's starting point
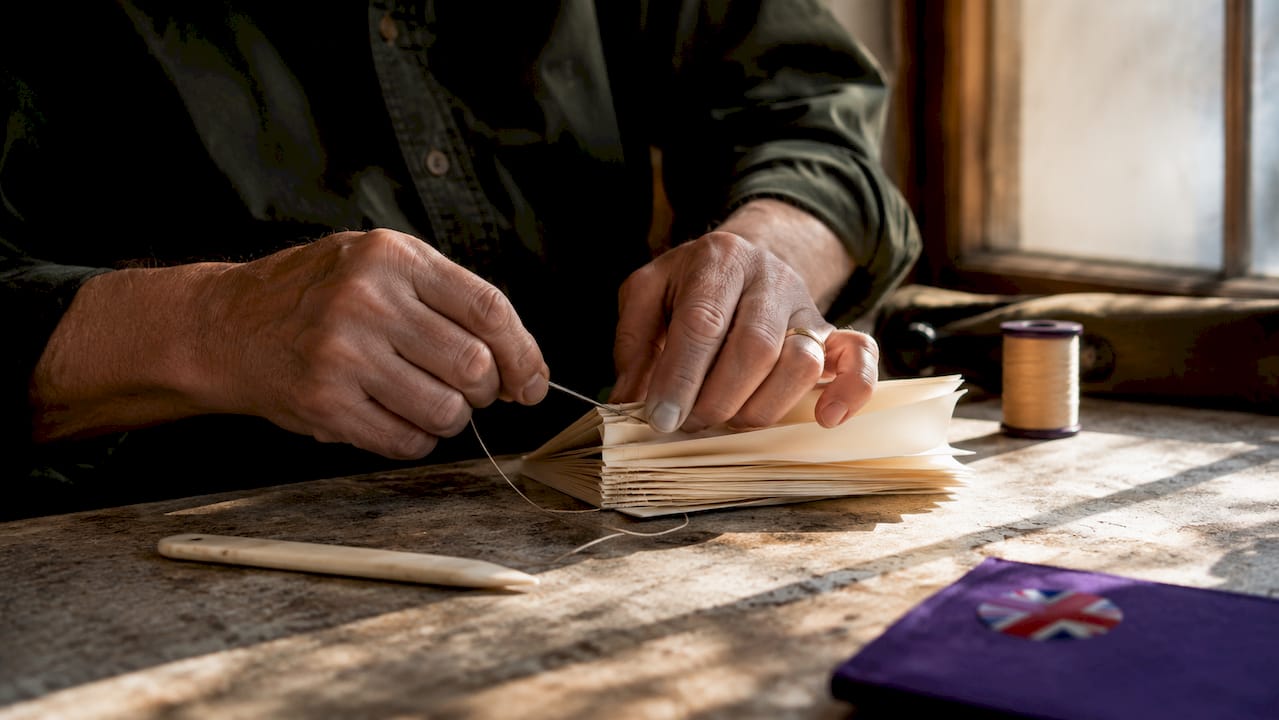
Pamphlet stitch uses a single signature and three holes. Thread your needle with about 24 inches of waxed thread. Push the needle through the center hole from the outside in, then out through the top hole, back in through the center, and out through the bottom hole. Tie off at the center hole, making sure the long thread tail sits on the opposite side of the stitch from the short tail. Trim both ends to about half an inch.
Coptic stitch: the open-spine method
Coptic stitch is the method of choice for journals and sketchbooks because the finished book opens completely flat. Coptic binding requires at least 5 sewing stations spaced about 1 inch apart for structural support. Fewer stations create weak points that fail under regular use.
- Mark 5 or more sewing stations on each signature and both covers.
- Punch holes through all stations with an awl.
- Attach the first signature to the back cover by sewing through the cover and signature at each station.
- Add the second signature, linking each stitch to the corresponding stitch on the first signature with a locking loop.
- Continue adding signatures, always linking back to the previous row.
- Finish by tying off at the final station with a square knot.
Wrapping thread in the same direction at every station maintains a uniform chain stitch and prevents structural weak points. Pass the needle under the previous stitch without splitting the thread. Splitting thread is the most common tension error in Coptic binding.
Case binding: the hardcover approach
Case binding produces the most durable result. Sew your signatures together using a kettle stitch at the head and tail of each signature. Once all signatures are sewn, glue the spine of the assembled text block with a thin, even layer of PVA glue. Let it dry fully before attaching the case cover.
Pro Tip: Leave a long thread tail at the start of each signature. Use that tail to tie off cleanly at the end without adding extra knots that bulk up the spine.
How do you make and attach covers for hardcover and sewn bindings?
Cover construction separates a good handmade book from a great one. The cover must be cut accurately, glued evenly, and pressed long enough to bond without warping.
For case binding, cut two pieces of book board to the height of your text block and about 3mm wider on the fore-edge. Cut a spine strip equal to the thickness of the assembled text block. Lay the boards and spine strip face-down on your cover material (fabric or decorative paper) with a 3mm gap between each piece. Apply PVA glue to the board surfaces, press the cover material down firmly, and fold the edges over, mitering the corners neatly.
Hardcover binding requires gluing the text block spine and aligning it with the fabric-covered boards. Apply glue to the endpapers (the first and last pages of your text block), then press the text block into the open case, centering it carefully. Close the book and press it under weight.
Hardcover books need 6–12 hours of drying under weight or in a press for full durability. Skipping this step causes the cover to warp or the text block to shift.
For Coptic-bound books, covers attach directly during the sewing process. No glued case is needed. The covers are simply punched with the same sewing stations as the signatures and sewn in as the first and last elements.
- Cut book board with a metal ruler and craft knife for clean edges
- Leave a 3mm gap between boards and spine strip when building the case
- Miter corners at 45 degrees to reduce bulk at the edges
- Apply PVA glue in thin, even layers to avoid lumps under the cover material
- Press the finished book under at least two heavy books for the full drying period
- Check hinge flexibility after drying: the cover should open smoothly without cracking
Pro Tip: Wrap your finished book in wax paper before placing it under weights. This prevents any excess glue from bonding the book to the weight above it.
What are common mistakes to avoid when finishing your bookbinding project?
Most finishing problems trace back to one of five errors. Catching them early saves you from rebuilding an entire text block.
The most damaging mistake is folding against the paper grain, which creates a book that resists opening and cracks at the spine. The second most common error is uneven hole spacing, which causes the thread to pull unevenly and distort the spine. Measure and mark every station with a ruler, not by eye.
Applying too much PVA glue at once is the third major error. Thick glue layers take longer to dry, trap air bubbles, and cause covers to warp. Apply two thin coats instead of one thick one. The fourth mistake is skipping the pressing step after gluing. The fifth is using standard office staplers for saddle stitch binding. Long-arm staplers produce clean staple binding. Office staplers cannot reach the fold line and ruin both the appearance and lifespan of the book.
Finishing tips:
- Press every signature under weight for at least 10 minutes before sewing.
- Apply PVA glue in two thin coats, letting the first dry before adding the second.
- Use a long thread tail to tie off cleanly without bulk at the spine.
- Press the finished book for the full 6–12 hour drying period.
- Test the spine flexibility before trimming any excess thread or material.
Pro Tip: Rub your waxed thread across a block of beeswax one more time just before sewing. This reduces friction through the paper holes and prevents thread from fraying mid-stitch.
Key takeaways
Matching your binding method to the book's intended use is the single most important decision in any hand bookbinding project.
| Point | Details |
|---|---|
| Match method to purpose | Coptic stitch suits flat-opening journals; case binding suits durable hardcovers. |
| Grain direction is non-negotiable | Always fold paper with the grain to prevent spine cracking and poor opening. |
| Coptic spacing matters | Space sewing stations about 1 inch apart with a minimum of 5 stations for structural strength. |
| Drying time is structural | Press hardcover books for 6–12 hours under weight to prevent warping and cover failure. |
| Thin glue layers win | Apply PVA in two thin coats rather than one thick layer to avoid bubbles and warping. |
Why I think most beginners overcomplicate bookbinding
Most people who try hand bookbinding for the first time buy too many tools before they understand what they actually need. I made the same mistake. A bone folder, a bookbinding needle, an awl, and waxed linen thread will take you through every project in this guide. The rest is refinement.
The choice of binding method should always follow the book's purpose. A journal you write in daily needs to open flat, which means Coptic stitch. A gift book or a manuscript you want to protect needs a hardcover case binding. Perfect binding looks clean but does not allow the book to open flat, making it a poor choice for journals or sketchbooks.
My honest advice: start with pamphlet stitch on a single signature. Sew ten of them. Your tension will improve, your holes will get cleaner, and you will understand how thread behaves before you commit to a 15-signature Coptic project. The craft rewards repetition more than it rewards expensive supplies.
Creativity in bookbinding shows up in cover choices, paper selection, and thread color, not in the complexity of the stitch. A simple pamphlet-stitched notebook with a hand-printed cover is more satisfying than a technically perfect book you struggled through. Build the skill first. The beautiful results follow naturally. You can find more ideas for personalizing your projects in this DIY bookbinding techniques guide from Munkterproducts.
— Mark
Handmade books start with the right materials
Getting your supplies right before you start saves you from mid-project stops and disappointing results. Munkterproducts carries a curated selection of notebooks, journals, and stationery that show exactly what quality hand-finished books look like, giving you a clear target for your own projects.

Whether you are just starting out or ready to tackle case binding, having the right paper and materials makes every step cleaner. Browse the craft journals and notebooks at Munkterproducts for inspiration and to see the standard worth building toward. For specialty papers and card stock that work well in bookbinding projects, the card and paper supplies at CraftSuPrint offer a solid range of weights and finishes suited to both covers and interior pages.
FAQ
What is the easiest bookbinding method for beginners?
Pamphlet stitch is the easiest method. It uses a single folded signature and three holes, requiring only a needle, thread, and awl.
How many sewing stations does Coptic stitch need?
Coptic binding requires at least 5 sewing stations spaced about 1 inch apart. Fewer stations create weak points that fail under regular use.
What glue is best for bookbinding?
PVA glue is the standard choice for bookbinding. It bonds paper and fabric cleanly, dries flexible, and does not yellow over time.
How long should a hardcover book dry after gluing?
Hardcover books need 6–12 hours of drying under weight or in a press. Shorter drying times cause warping and weak cover adhesion.
Does paper grain direction really matter in bookbinding?
Yes. Folding against the grain prevents the book from opening properly and weakens the spine over time. Always confirm grain direction before cutting and folding your pages.